Here are some exercises to apply what you’ve learned from the guide! You can work in any repository you’d like - we recommed following the exercises in order within the same repository.
Basics
Exercise 0: Configure Git
Set up your Git identity! This includes materials from our Setup page.
Instructions
- Configure your username.
- Configure your email.
- Display these.
💡 Show Solution
git config --global user.name "Your Name"
git config --global user.email "your@email.com"
git config --list
Your final result should look similar to the following: 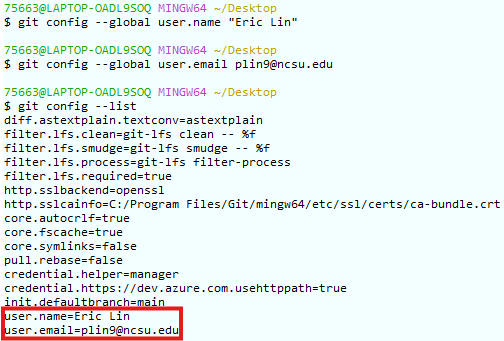
Exercise 1: Make your repository
Create a private Git repository to track your work on GitHub. This uses content from our Privacy page. Do this exercise from the GitHub page (we’re NOT working from the terminal quite yet!).
Instructions
- On GitHub, create a private repository named
practice. - Add a file named
exercise1.txt. - Commit the changes.
💡 Show Solution
- On GitHub, click New Repository
- Name it something, such as
practice - Set the privacy to private.
- Click Create repository.
- To make a file on GitHub from the new repository page, click the text boxed in red as below:
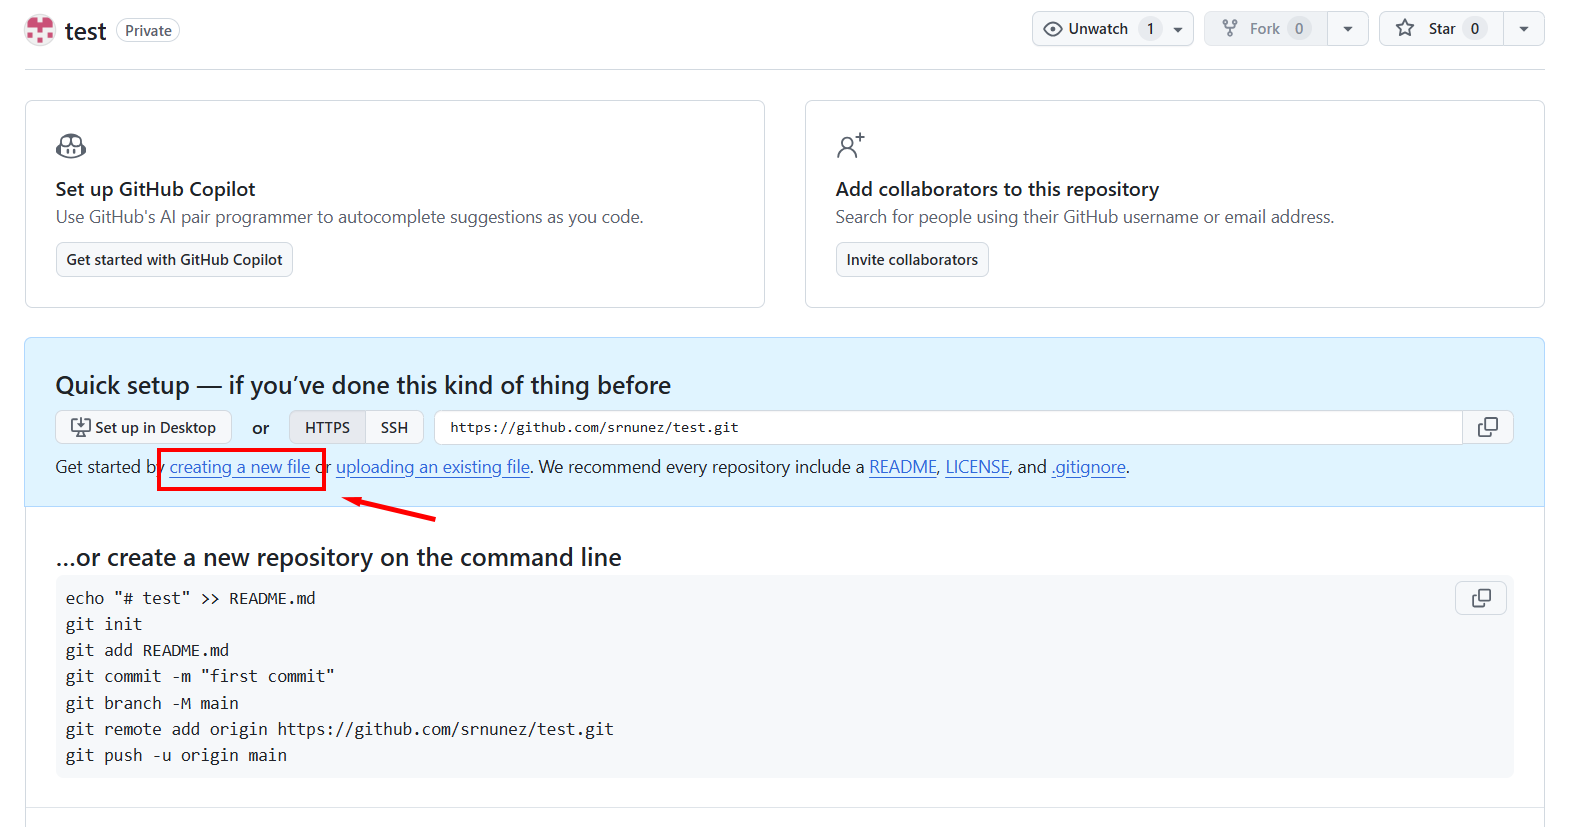
- Name this file something, such as
exercise1.txtand put any text you would like (or none at all!). - Click Commit new file.
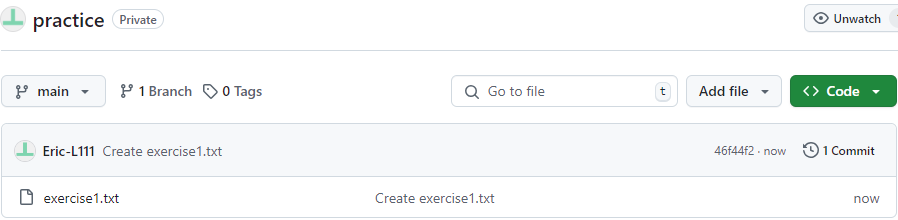
- Your final result should look similar to the following:
Exercise 2: Clone repo
Clone your practice repo and enter the workspace so you can edit its contents locally. This exercise references our Clone page!
Instructions
- On GitHub, find the cloning URL for your repository.
- Clone your repository in your command line.
- Change to the repository folder to edit the contents.
💡 Show Solution
- Find the link to your repo on GitHub (e.g. https://github.com/sophia-nunez/guide-to-git.git)
- Enter the following commands
$ git clone <repository URL> cd [repo-name] -
Your final terminal output should look similar to the following:
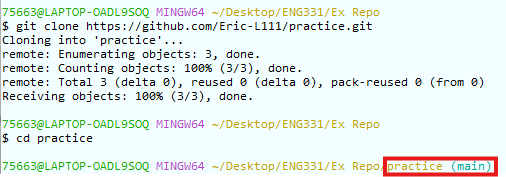
Your workspace should have a similar structure as below:

Exercise 3: Push Changes
Make and edit a file, and add this to your remote repository. Use your terminal for this exercise to practice the basic commands of Git!
Instructions
- Create a file called
hello.txt. - Stage the changes.
- Push to your repository.
💡 Show Solution
- Create the
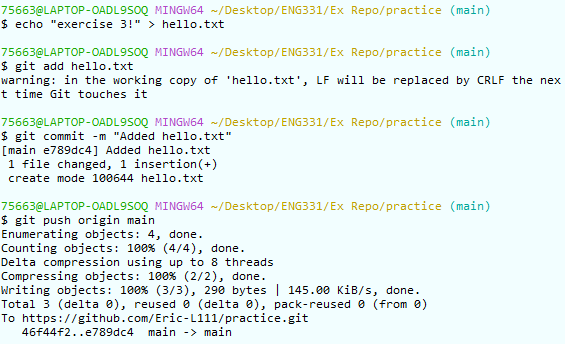
hello.txtfile in your directory. This can be done using your editor or:echo "exercise 3!" > hello.txt - Run
git add hello.txt - Run
git commit -m “Added hello.txt” -
Your final terminal output should look similar to the following:
 Your workspace in the file explorer on your computer should contain the following files:
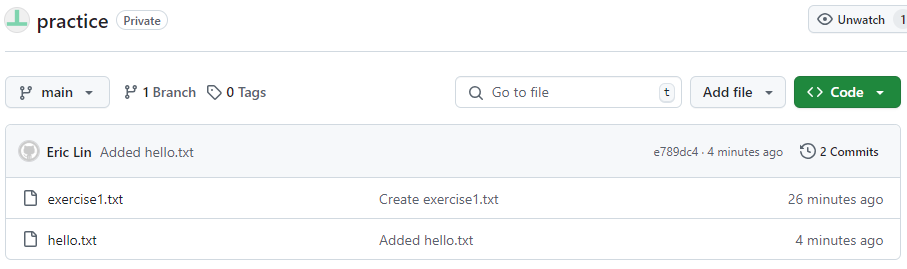
On GitHub, your commits should be displayed in a similar manner to this:
Intermediate
Exercise 4: Merge Conflicts (solo)
Create a repo for yourself. Add a file called conflict.txt, and then get a merge conflict to occur. Bonus points for solving the conflict!
Instructions
- In your practice repository, add a file called
conflict.txtand push this to the remote. - Cause a merge conflict by editing files on GitHub, then locally.
- Resolve the conflict and push your local changes.
💡 Show Solution
- After pushing
conflict.txt, open this file on GitHub editor by clicking the pencil icon. - Edit the file on GitHub, then click the green Commit changes button.
- Without pulling, edit the same lines of
conflict.txtlocally from your editor. - Commit the changes using
git add .andgit commit -m "message here":git add conflict.txt git commit -m "Updated conflict.txt with conflicting edit" - Attempt to pull using
git pull. You should see something like this:$ git pull Auto-merging conflict.txt CONFLICT (content): Merge conflict in conflict.txt Automatic merge failed; fix conflicts and then commit the result.For example, your terminal might look similar to the following:
/bash-conflict.png)
- Fix the conflict by editing
conflict.txtin either your IDE or in the command line. This process is demonstrated in detail in the example section of Merge Conflicts. In the text editor, conflicting lines should be marked similar to the example below:/merge-conflict.png)
- Pushing after fixing the conflict, your terminal output should look similar to the following:
/bash-resolved.png)
Exercise 4: Merge Conflicts (partner)
Create a repository for you and your partner, or use the practice one. Cause a merge conflict and try to resolve it. Bonus points for solving the conflict!
Instructions
- Have you and your partner clone the same repository.
- Add a file called conflict.txt.
- Have both people edit the file to get a merge conflict to occur.
- Push each person’s change and resolve the conflict.
💡 Show Solution
- Have you and a partner both clone the same repo and edit the same line in conflict.txt locally.
-
Ask your partner to push their changes. Now, you try to push your changes via:
git add conflict.txt
git commit -m "conflicting edit"
You should see something like this:
Auto-merging conflict.txt
CONFLICT (content): Merge conflict in conflict.txt
Automatic merge failed; fix conflicts and then commit the result.
For example, your terminal might look similar to the following:
/bash-conflict.png)
- To fix the conflict, you can either edit conflict.txt in your IDE, or try the following commands:
 # accepting their changes
 git merge --strategy-option theirs
Or
# keeping our changes Git merge –strategy-option ours - Pushing after fixing the conflict, your terminal output should look similar to the following:
/bash-resolved.png)
Advanced
Exercise 5: Create a branch for a repo and create a PR
Create a repo, or go to your practice one, and practice using branches. This refernces our page on Branches!
This exercise can be done on GitHub or from the command line. We recommend trying both options - just make two separate files!
Instructions
- Create a branch called
exercise-5. - Add a file called branch-practice.txt.
- Commit and push your changes.
- Submit a pull request to merge
exercise-5into main.
💡 Show Solution
- Option 1: GitHub
- On the
practicerepository page on GitHub, click Branch: main and create a new branch by typingexercise-5into the menu. - Click Add file -> Create new file and name it
branch-practice.txt. - In the file contents section, type any text you’d like.
- Click Commit changes
- GitHub should display an option to Compare & pull request. Click this and submit the pull request.
- Click Merge pull request and Confirm merge.
- On the
- Option 2: Command Line
- Go to your workspace for the repository using
cd [path]. - Create and switch to the new branch using
git checkout -b exercise-5. - Create the file in you editor or using the following commands:
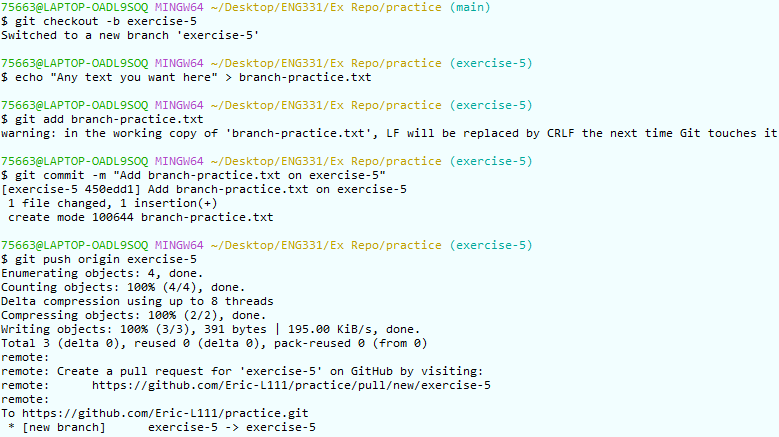
$ echo "Any text you want here" > branch-practice.txt $ git add branch-practice.txt $ git commit -m "Add branch-practice.txt on exercise-5" - Push the new branch using
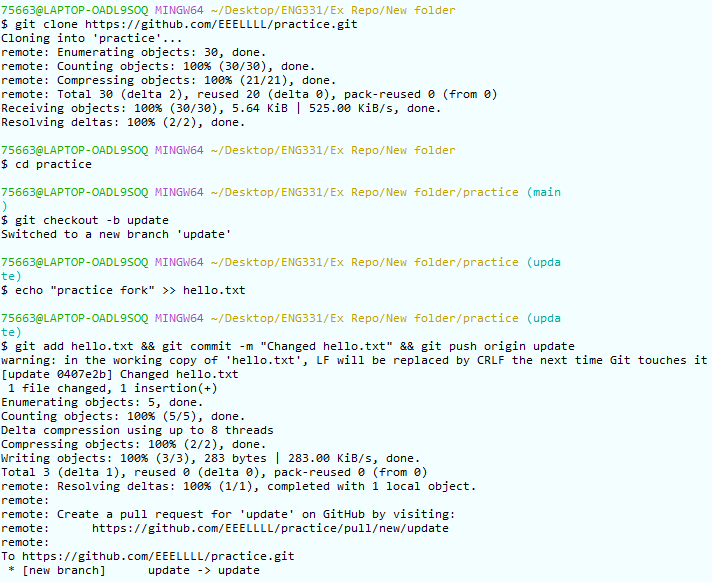
git push -u origin exercise-5. - After running each of these commands, your terimanl output should look similar to the following:
- Go to GitHub, where you should see a prompt to open a pull request:
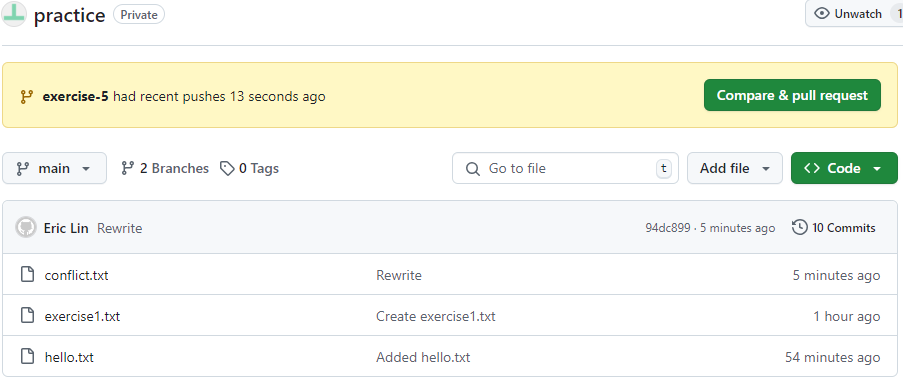 Click Compare & pull request, then Merge.
- Go to your workspace for the repository using
- After merging, your GitHub page should look similar to the following:
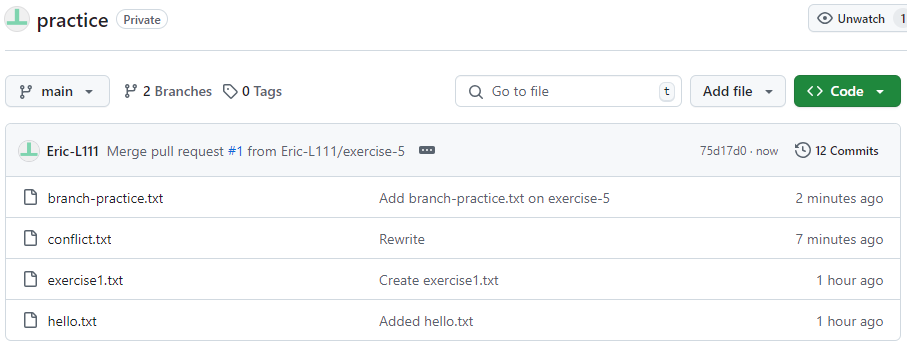 Note that the commit history has a merge, and the commit message made on your branch appears in main.
Exercise 6: Fork a repo and create a PR (requires a partner)
Create a repo. Have a partner fork your repo and submit a pull request. This uses material from our page on Forks
Instructions
- Fork the repository
- Clone this fork
- Edit a file in the repository
- Commit and push these changes
- Submit a pull request and check GitHub
💡 Show Solution
- Have your partner fork your repo on Github
- Have your partner clone their forked repo using
git clone <their repo url>. - Your partner then must create a new branch using
git checkout -b update(or any name) - Have your partner edit a file in their local repo, for example hello.txt
- Have your partner commit these changes via
git add hello.txt git commit -m "Changed hello.txt" git push origin update - After running each of these commands, your terimanl output should look similar to the following:
- Have your partner go on Github and submit a PR:
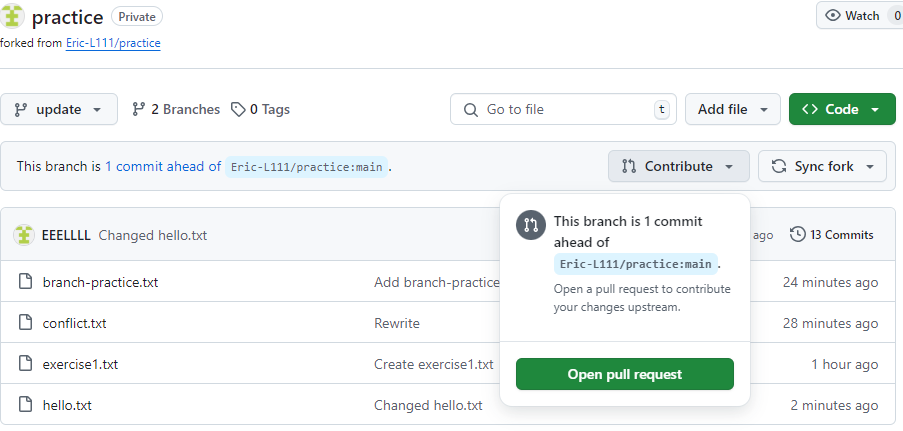
- You should see their Pull Request when you enter your repo on GitHub! Your final result should look similar to the following:
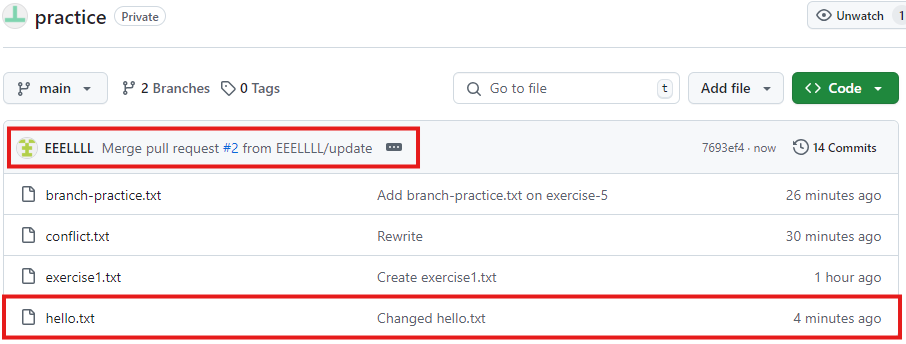 Note that the commit history has a merge, and the commit message made on your fork appears in main.