Forks
Forking is a way to make a personal copy of someone else’s repository. It’s commonly used when you want to contribute to an open-source project or experiment with a repo you don’t own.
Introduction
A fork is your copy of someone else’s GitHub repository. When you fork a repository, it has the following traits:
- It appears under your GitHub account.
- You can clone it, modify it, and push changes.
- It stays connected to the original (upstream) repository.
Forks are used when you don’t have write access to the original repository but want to make changes. You can do this in your fork and then submit a pull request asking for these to be incorporated into the original repository.
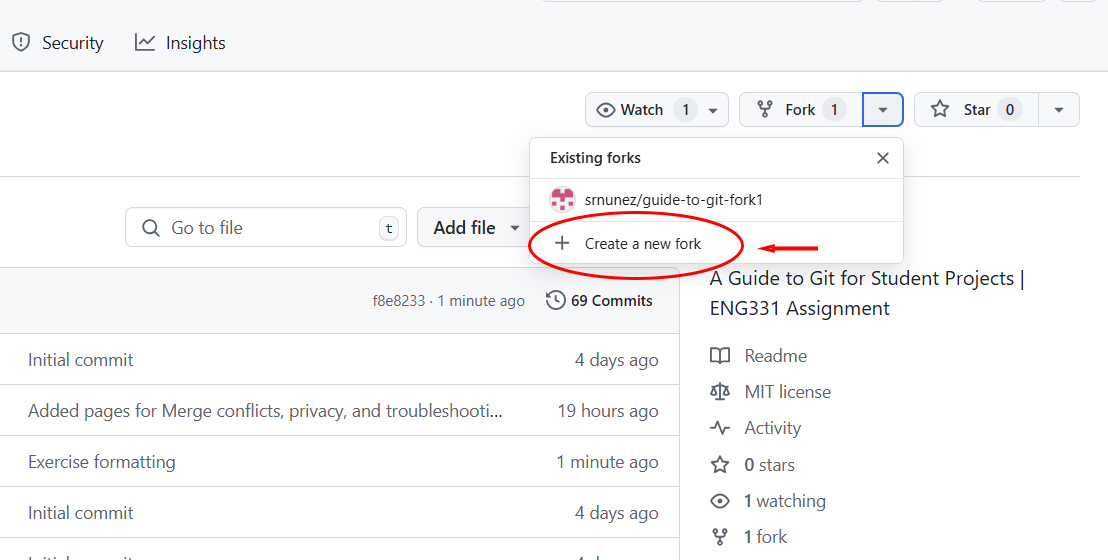
You can view forks for a repository in the Fork dropdown in the top right corner of the repository page:

Fork vs. Branch
There are some differences between branches and forks which define different use cases for each.
- A branch is used to manage different versions of a project within the same repository. It’s a way to organize work in group projects where everyone has access to the repository.
- A fork creates a completely separate copy of the repository under your own GitHub account. It’s useful when you want to make changes to a project you don’t own or have write access to. If you’re familiar with open-source, you might recognize forks from there!
Overall, use branches when working within a repository you have access to, and forks when you want to contribute to a project you don’t control.
How to Fork a Repository
To create a fork, do the following:
- Go to the GitHub page of the repository you want to fork.
- Click the Fork button in the top-right corner and select Create new fork:
- Name the fork and finalize creation. GitHub will automatically take you to your fork of the repository - it may take a second to do so.
You now have your own copy of the repo, and you can clone it to your computer to edit!
Modifying a Fork
While you could make changes directly on the main branch of your fork, it’s recommended to create a new one for each section you want to work on. This is because:
- It keeps your
mainbranch clean and in sync with the original repository. - It makes it easier to submit multiple pull requests without overlap.
- It helps reviewers see what specific change you’re proposing.
To make these changes:
- Create a new branch for your work:
$ git checkout -b my-branchname - Make your changes, then stage and commit them:
$ git add . $ git commit -m "Commit message here" - Push your branch to your fork:
$ git push origin my-branchname - Open a pull request on GitHub:
- Go to your fork on GitHub
- Click Compare & pull request
- Submit the pull request to propose your changes to the original repository under the Contribute dropdown:

For more information on PRs, check out our Pull Requests page!
Sync Your Fork
The original repository you forked may change over time as others contribute. To keep your fork current and avoid merge conflicts, it’s important to regularly sync your fork. This can be done on GitHub or in your command line.
How to sync your fork on GitHub:
On the repository page for your fork, there will be a Sync button in the top right corner:
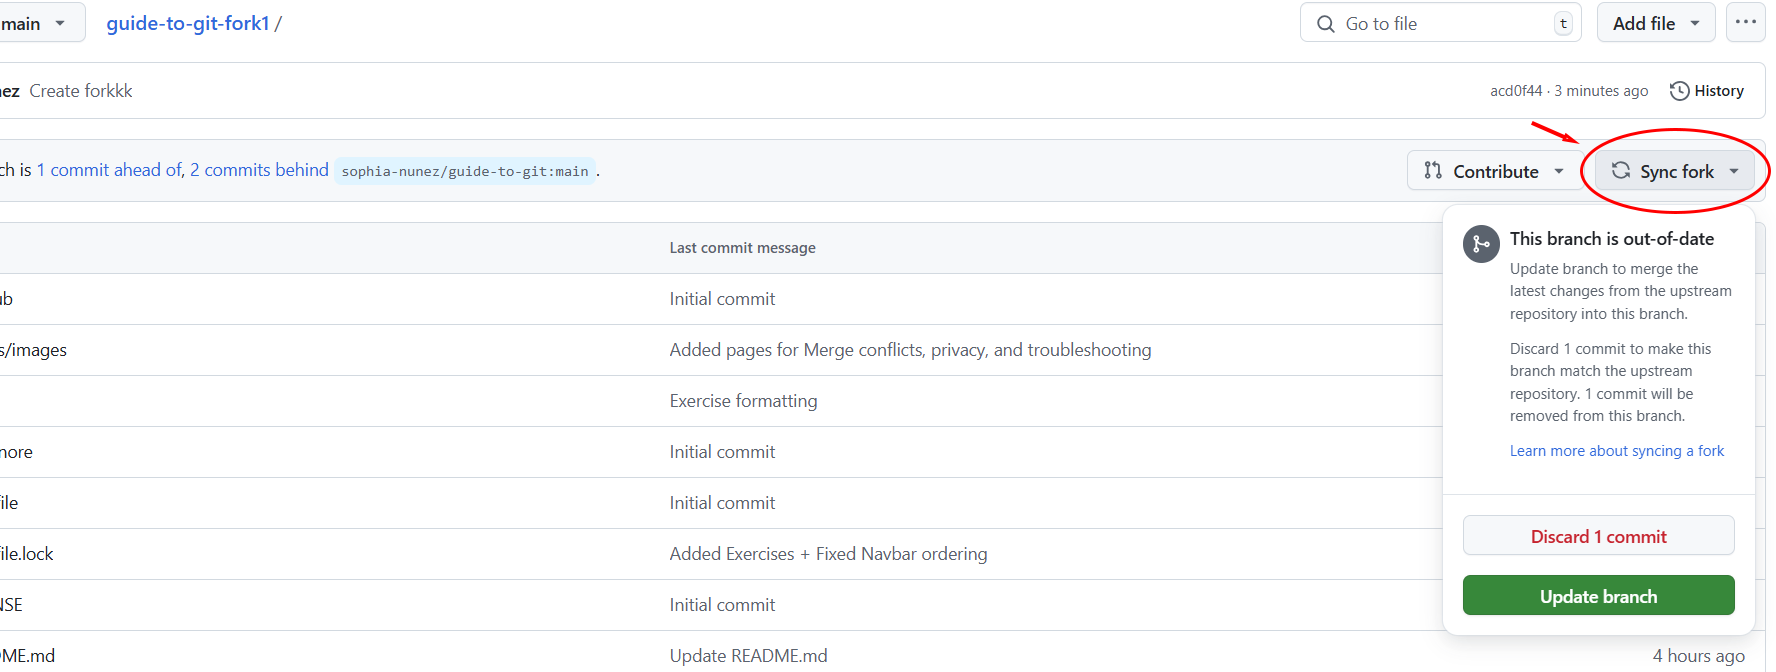
Click this dropdown for more information on what changes are different, and some options on how to sync them!
How to sync your fork on the command line:
- First, make sure you’ve added the original repository as a remote called
upstream:$ git remote add upstream [Original Repo URL] -
Fetch the latest changes from the original repository:
$ git fetch upstream -
Merge those changes into your local
mainbranch:$ git checkout main $ git merge upstream/main -
Push the updated
mainbranch to your fork on GitHub:$ git push origin main
Once your fork is synced, you’re ready to create new branches or contribute without worrying about being out of date.