Git Clone
To start working on a project stored in a remote repository, you need to bring it to your computer. This is done using the git clone command, which creates a copy of the remote repository on your computer. This might sounds familiar - that’s because this is your local repository! This will contain all of the files and Git history for the project, allowing you to start making changes locally.
How to Clone a Repository
The command for cloning is:
git clone <repository-url>
Getting the Repository URL
The URL for a repository can be found on the GitHub page for the repository. In the “Code” tab near the top is a green box labeled Code, as pictured below.
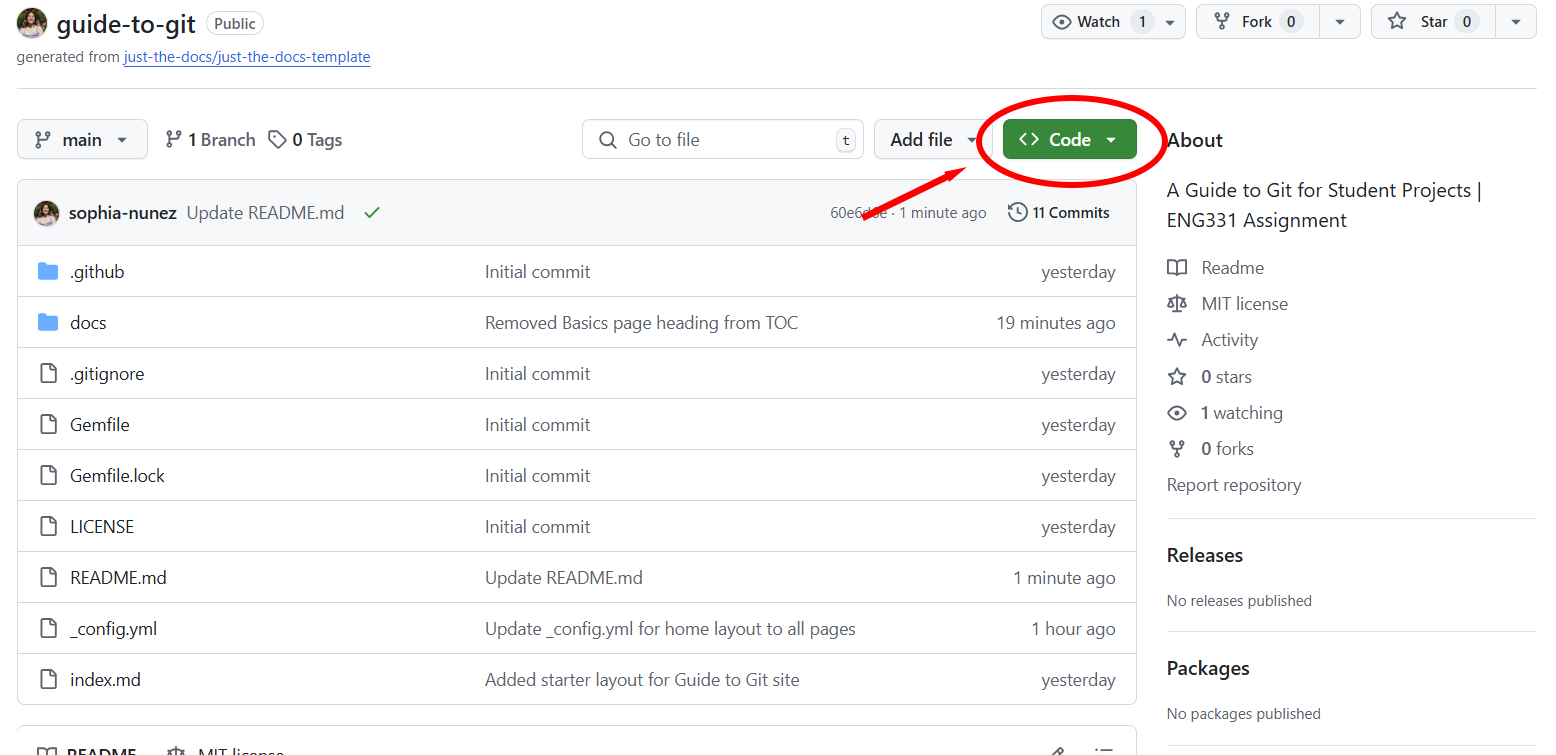 A repository on GitHub with the button used to get the cloning URL circled in red.
Clicking the dropdown arrow for this box opens a section that allows you to get the URL for the repository.
Depending on the setup of your computer, you may be able to use different options such as SSH. However, this requires additional setup, so we recommed using HTTPS for now. If you’d like to learn how to set up an SSH key, check out our page for this at SSH!
 A repository on GitHub with the Clone URL menu expanded. The button used to copy the cloning URL is circled in red.
Using the Clone Command in Terminal
Once the URL for the repository has been copied, go into your terminal. Use cd <filepath> to move into the directory you want the repository to go in. Then, use git clone <url>, replacing <url> with the copied URL. Your terminal should look like this:
$ cd <filepath>
$ git clone <URL>
Running this command should give output similar to the following:
$ git clone https://github.com/sophia-nunez/guide-to-git.git
Cloning into 'guide-to-git'...
remote: Enumerating objects: 62, done.
remote: Counting objects: 100% (62/62), done.
remote: Compressing objects: 100% (52/52), done.
remote: Total 62 (delta 18), reused 41 (delta 7), pack-reused 0 (from 0)
Receiving objects: 100% (62/62), 16.94 KiB | 495.00 KiB/s, done.
Resolving deltas: 100% (18/18), done.
After running git clone, there should be a new folder inside your current one named after the repository that was cloned. The latest version of all of the files in the remote repository should show up here!
Alternative uses of the URL
In some IDEs, you may be able to clone using a built-in view or function. For more information on this, check out our page on Git in IDEs!
Summary
Cloning is the first step in working with a Git project that’s stored remotely. Using git clone, you bring down a complete copy of the repository — including all files, branches, and history — onto your own computer as a local repository. From here, you can explore the code, make changes, and start using Git commands like add, commit, and push.
Cloning follows three general steps:
- Make or access your repository
- Copy your repository URL
- Clone the repository using the URL in your Terminal or IDE
Cloning sets up the connection between your local and remote repositories, making collaboration and version control easy from the start.